E-Paper River Level Alert
I live close to a small stream which gets fairly high during periods of prolonged heavy rain so I wanted to build a quick project ideally before storms Babet, Ciaran and Debi arrived. Although the Government offer a flood-warning service, their phone calls often come at inconvenient times and tend to cover a wider area of the country than I need.
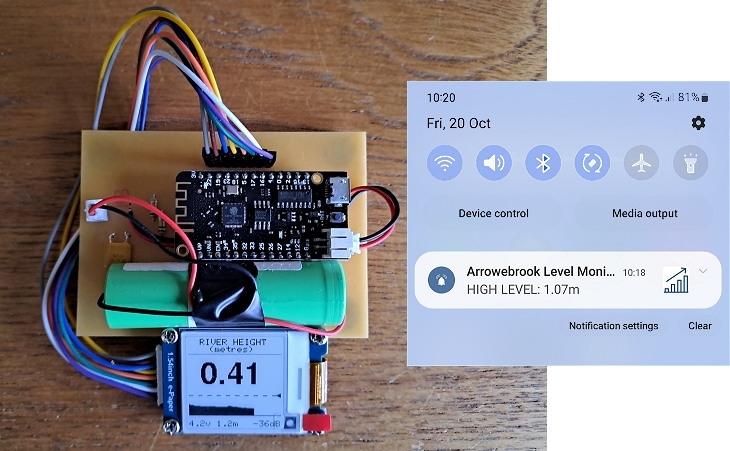
The project simply accesses the UK Government's river-level monitoring website [*] at 15-minute intervals, displays the current level on a 1.54" e-paper display, and sends a notification to my mobile phone if the river reaches a level pre-set in the Arduino sketch. It has the advantage that I'm able to pre-set the level at which I receive a notification based on experience.
The area-graph/histogram at the bottom of the display shows about 2 days of data. It's only intended as a guide to show trends and isn't particularly accurate. The ESP32 doesn't have any "long-life" EEPROM in which to save the data, that I was happy to use, so the data is lost if the power is removed or the ESP32 is reset.
[*] The project actually accesses a section of the Government website set up to provide the data in HTML and JNOS formats. It's updated every 15 minutes so there's no point in connecting to the site more often.
This project's hardware is very similar to the ESP32 Temperature Monitor except I used a Wemos Lolin32 Lite (v1.0.0) version as I had one available. The module has a built in lithium battery charger; there should be no need to remove the battery for charging so the data for the display histogram is not lost. The data is stored as an array in the ESP32's RTC memory which remains active when the ESP32 is put into deep-sleep mode and (unlike other memory) isn't cleared when it wakes up.
Circuit Diagram

Waveshare 1.54" e-paper display. The PiHut
WEMOS LOLIN32 ESP32 Lite V1.0.0. eBay: DKJNA
The simple circuit is built around a Wemos ESP32 LoLin32 Lite v1.0.0. It should work equally well with other ESP32 modules but, so far, I've not been successful in getting the e-paper display to work with an ESP8266. The ESP32 is extremely low power when it's in sleep mode so is probably better-suited than the ESP8266 anyway - especially considering there's very little difference in the price these days.
The Waveshare 1.54" e-papaer display automatically goes into very low power mode when it's not being refreshed so the entire project should last for months before the battery needs re-charging.
Some LoLin ESP32 modules provide access to the battery voltage and even have a dedicated GPIO Pin but, as there's no access to the actual battery connection on the LoLin32 Lite v1.0.0 module, it's not possible to monitor the battery voltage directly from the module.
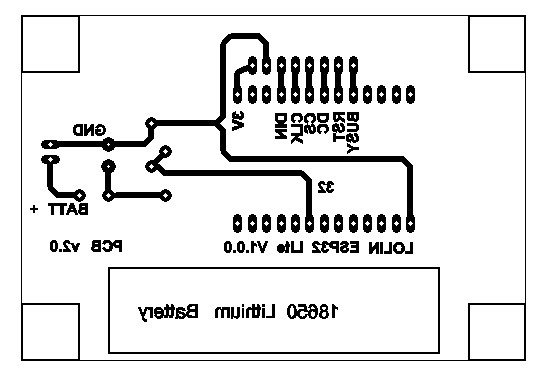
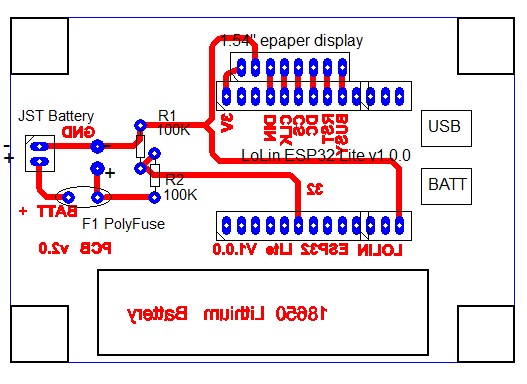
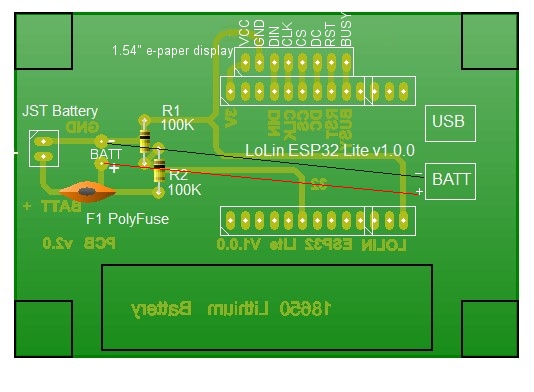
On the PCB layout, below, the 18650 battery plugs into a separate PH2 JST connector. From there, two 100k resistors form a potential divider across the battery with their junction connecting to the LoLin32 modules GPIO Pin 32 in order to monitor the battery voltage. A short jumper lead connects the full 18650 battery voltage to the PH2 connector on the LoLin32 module to make use of the module's on-board low drop-out voltage regulator and to enable the module's built-in charger to charge the battery.
Printed Circuit Board
This PCB is based on the ESP32 WeMos LoLin32 Lite v1.0.0. Other ESP32 modules should work but the pin layout will be different so the PCB will need adjusting to suit.In practice, a PCB is hardly necessary for such a simple circuit but it does help to hold the two resistors and a resettable polyfuse. I like to include a polyfuse in projects which use a lithium battery - especially ones which have a built-in charger. Its current rating isn't critical but about 1A isn't going to get warm in normal use but will easily go open circuit before a shorted or over-charged lithium battery could cause any grief.
Setting up the Arduino IDE
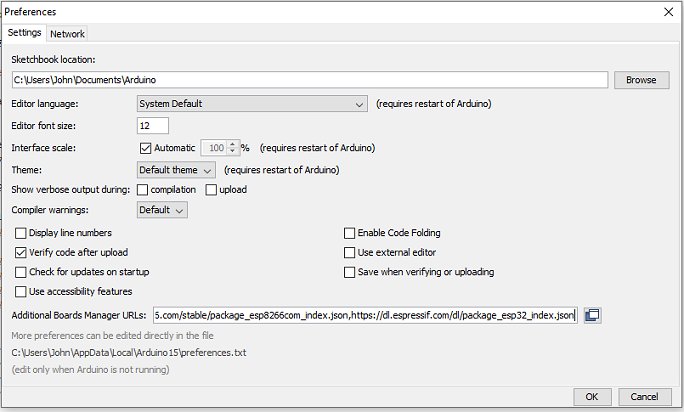
If you haven't used the ESP32 in the Arduino environment before, it's necessary to install the ESP32 Board definitions into the Arduino IDE.In the Arduino IDE, select File -> Preferences.
In the Additional Boards Manager URLs text box, enter: https://dl.espressif.com/dl/package_esp32_index.json then click the OK button.
If there's already an entry in the text box, separate them with a comma (,).
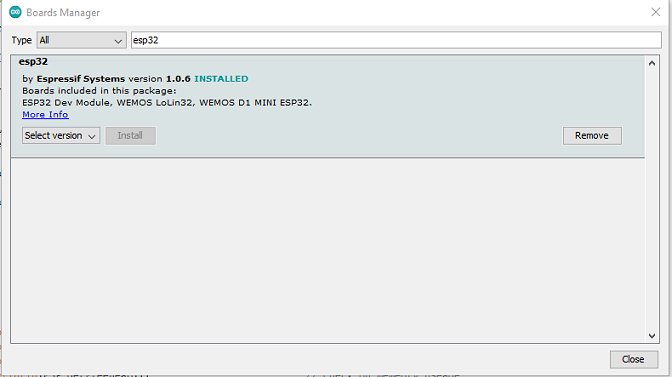
From the main Arduino IDE window, select Tools -> Board -> Board Manager...
Wait for the platforms index to download then scroll down the list to esp32 ( or type esp32 into the search box) and click Install.
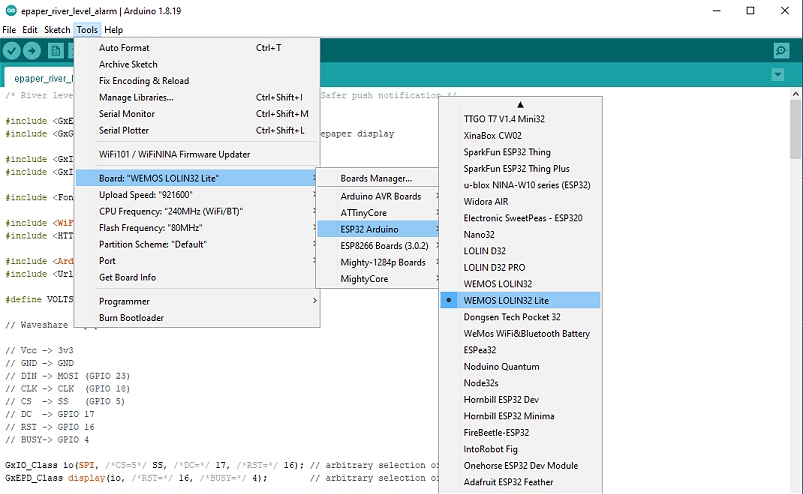
In the Arduino IDE, under Tools -> Board -> ESP32 Arduino select WEMOS LOLIN32 Lite (or as appropriate, if you're using a different ESP32 module).
Additional Libraries for the E-Paper River Level Alert Sketch
The sketch also needs a few additional libraries as follows.
| E-Paper library | https://github.com/ZinggJM/GxEPD |
| Adafruit Graphics library | https://github.com/adafruit/Adafruit-GFX-Library |
| JSON library (for parsing received JSON data) | https://github.com/arduino-libraries/Arduino_JSON |
| URL Encode library | https://github.com/plageoj/urlencode |
Download the zip files to a suitable folder and then use Sketch -> Include Library -> Add .Zip Library (Or install the libraries using your preferred method.)

Copy the Arduino sketch below and paste it into the IDE.
Edit the values between lines 38 and 52.
Your router SSID and Password are at lines 46 and 47.
Create a PushSafer account at https://www.pushsafer.com/ and copy your PushSafer Key and Device ID into the Sketch at lines 49 and 50.
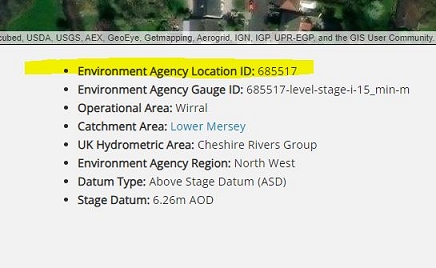
Each river-level monitoring station has a unique ID. Unfortunately, I wasn't able to locate a list of them on the Government flood-warning website. However, I did find a 3rd party website which displays similar data (but doesn't provide data at frequent intervals) and was able to find the Government's Station ID near the bottom of the page (Environment Agency Location ID).
Go to https://riverlevels.uk/levels and locate your "river of interest." Scroll down the page to locate the Station ID and edit the Arduino Sketch at line 38.
Go to https://check-for-flooding.service.gov.uk/river-and-sea-levels and locate your "river of interest" to check the "maximum level" and "high (alert) level" shown on the graph and enter the values in the Sketch at lines 41 and 42 respectively. At line 43 enter a value somewhat less than than the alert level.
The Arduino Sketch