Arduino and microSD Cards
I recently bought a microSD breakout board from Hobby Electronics and decided it was time to connect it to the Arduino.All SD cards are 3.3 volt devices - applying 5 volts will see them off fairly rapidly - and, on inspection, the microSD breakout board was little more than a tiny socket mounted on a PCB so some sort of voltage level converter would definitely be required.
The board originates from Sparkfun Electronics and, for what you actually get for your money, it's probably somewhat overpriced. However, the Hobby Electronics price does accurately reflect the manufacturer's price taking overseas shipping costs into account. Anyway, I'd got one so it was time to put it to some use!
Some time ago, I needed to do some voltage level conversions for a barometer project and had bought an ADG3304 Bidirectional Logic Level Translator. It turned out to be unsuitable for the barometric sensor I eventually used so I had the ADG3304 spare. I have virtually no experience with Surface Mounted Devices so I'd already had this chip soldered to an adaptor by Tirna Electronics who will source the chip (from either Farnell or RS Components) and mount it on an adaptor for a modest price. This nicely circumvents those suppliers' minimum order charges so it can actually work out cheaper than unnecessarily adding unwanted "makeweights" to an RS or Farnell order!
Connecting the microSD Breakout Board
The ADG3304 is a bi-directional level converter which doesn't need any "direction" information. Pins 2, 3, 4 and 5 are the 3.3 volt side and the corresponding pins on the 5 volt side are 13, 12, 11 and 10. Put the correct voltage on a pin on one side and the other voltage appears on the corresponding pin on the other side! The Chip Enable pin (pin 8) is active high and is connected to the 3.3 volt supply.

One thing that surprised me was that SD cards themselves (of all 'flavours') actually have a fully-fledged SPI interface on-board so all that's required from the Arduino is to connect its dedicated SPI pins through the level converter to be up and running - or so I thought!
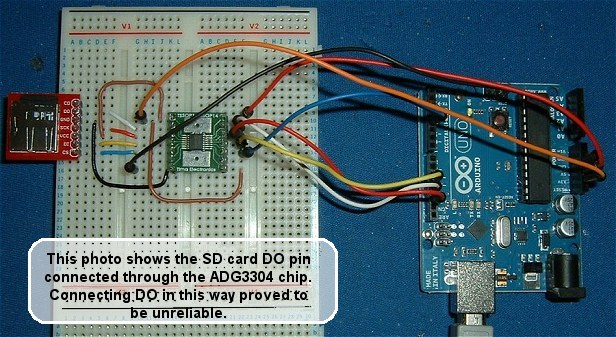
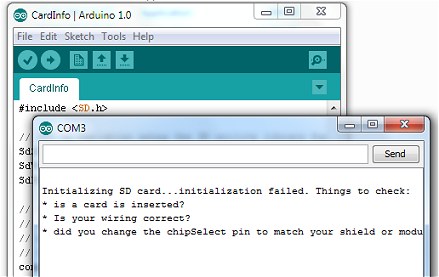
It seemed logical to connect all four lines between the SD Card and the Arduino (MOSI, MISO, SCK and CS) through the ADG3304 level converter but, after uploading the Arduino Examples | SD | CardInfo sketch, the Arduino failed to detect the SD card.
Although the MOSI, MISO and SCK pins are fixed in the Arduino hardware, the CS pin is a personal preference and different sketch examples (and commercially available 'shields') provided by various websites use different pins. A careful check showed that I was using the correct pin on the Arduino for the Chip Select; the default for the Arduino sketch examples being pin 4.
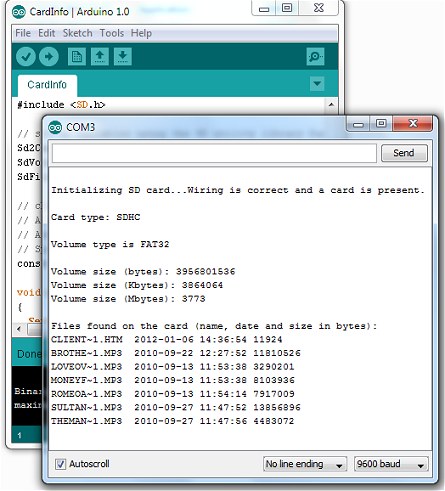
The adafruit.com data logger Arduino shield is a full-featured board with a full-sized SD card holder and a RTC and that does have level conversion on board for its SD card. A quick check of its schematic shows that the 3.3 volt Data Out from the SD card is not translated to 5 volts for the Arduino MISO input. I tried doing the same with my microSD circuit and violà, success!
For a fully "robust" circuit, I'll add a 3.3 volts ldo regulator instead of relying on the Arduino's. The Arduino can only supply about 50mA on its 3v3 pin and the SD cards can require up to 100mA when writing data to them.
 |  |
Unfortunately, my old analogue CRT oscilloscope just isn't up to the job with today's electronics so it wasn't really possible to tell but I suspect the SD card's SPI is very critical of the pulse shape and, although the ADG3304 is designed for exactly this use, mounting it on a breadboard with relatively long (6cm) connecting leads was upsetting the wave shape to the extent that using the 3 volt Data Out signal from the card directly to the MISO input on the Arduino gave much better results.