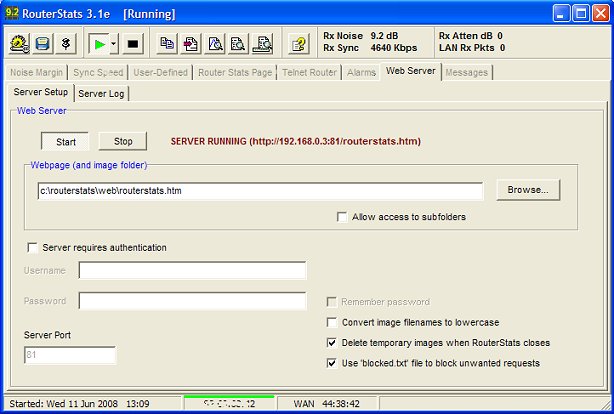
RouterStats can be configured to act as a simple web server in order to make any of the graphs available remotely as a browser webpage.
Use the Browse button to select a webpage. A sample page (routerstats.htm) is provided with the RouterStats zip package but you can use your own page. RouterStats will create temporary images for each of the graphs marked for capture in the main configuration. The images will be created every time the main sample timer interrogates the router so providing virtual real-time graphs. The filenames will be the y- (vertical) axis name with spaces and any "illegal" filename characters replaced with the underscrore character. They can be forced to use all lower-case characters by checking the checkbox. They will be saved in the same folder as the webpage.
A simple text file, filename blocked.txt can be saved in the same folder. Whole IP addresses listed in this file (one IP address per line) will be blocked from accessing the server if the Use 'blocked.txt' file to block unwanted requests is checked (See Web Server Log, below).
If the Server is running when RouterStats is closed, it will start automatically next time RouterStats is opened. Whenever the server is running, a green bar will appear above the WAN IP address on the StatusBar, as shown below:

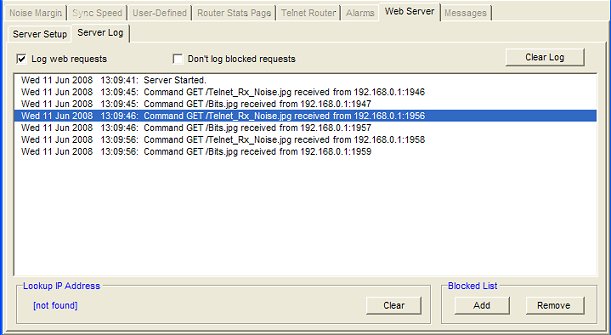
The server keeps a simple log of web requests. Click on an entry to perform a reverse lookup. If the Add button is pressed, the IP address will be added to a file called blocked.txt. This simple text file can be created manually using Notepad but it will be created automatically (if it doesn't already exist) when the Add button is pressed. The file is saved in the same folder as the webpage and images.
The Blocked List is only intended as a quick means to limit access of a specific IP address. For more comprehensive 'filtering', you should use your router's firewall rules.

Connect to the router's configuration in the usual way, select Services and click the Add Custom Service button.

Enter a suitable name, select TCP/UDP as the type and type the same Port number for Start Port and Finish Port. The default Port used by RouterStats is 81 - there should be no need to change this unless you're already running another service which uses that port.

Select Firewall Rules and click Add

Select the name of the service from the drop-down list and type in the LAN IP address of the computer on which the RouterStats server is running. You will find that as shown below after you have pressed the Server Start button:

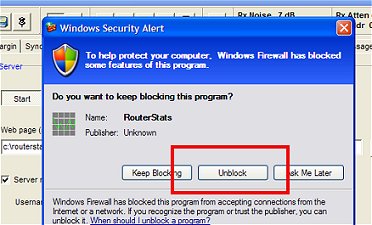
Finally, if you're also running a software firewall, such as Windows' own, you'll need to unblock the RouterStats server when you first start it.
You can find a fuller explanation of Port Forwarding on my website at http://www.vwlowen.co.uk/video/server.htm where you will also find a link to a website for other routers.