Once the etching process is complete, clean the board thoroughly using warm running water,
washing up liquid and a kitchen cleaning pad - the kind with sponge on one side and a scouring
surface on the other. Ensure the copper tracks are clean and shiny and examine the tracks, using a
magnifying glass if necessary, to make sure there a no hairline cracks in them and that the copper has
been properly etched away between adjacent tracks.
Once the PCB is clean and dry, drill all the remaining holes giving those components which required accurately positioned holes a final check.
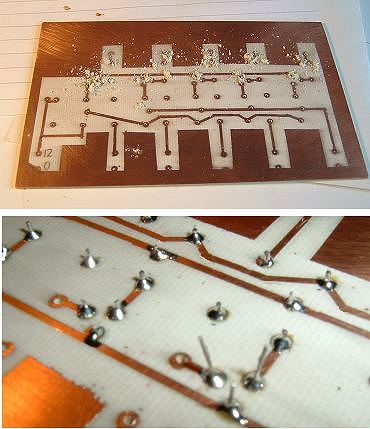
Incidentally, leaving large areas of copper as shown in these photographs, is good practice for parts of the circuit which are connected to 0v (or Ground). As a bonus, it helps preserve the etching solution. Use plastic electrical tape to mask large areas from etching - ensuring it is pressed down really firmly.
While the copper is still clean and shiny, begin to solder in the components from the non-copper side. Solder the component in first, then snip off any excess wire ends. I prefer to solder parts in one at a time as this prevents missing any soldered joints.