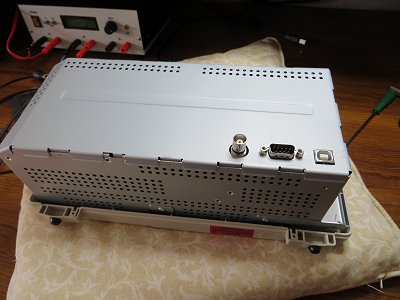
Rigol DS1052E DSO ~ Fan Modification
Comparison of the fans
The existing fan is marked GLOFN GFA06015H12H. Although I haven't been able to verify this for myself, apparently, it's specifications are:60 x 60 x 15mm. 5500rpm at 12v DC. The airflow is 34.2m3/h and it makes 36.5dB of noise.
I found a fan on eBay which out-performs the one fitted. Here's a direct link to KabelPoint - the supplier in Germany but a search for "Xilence 3Pin Molex 12 Volt 22 dB" easily finds it on eBay.
According to the KabelPoint website, the fan's specifications are:
60 x 60 x 12mm. 2100rpm at 12v DC. The airflow is 50m3/h and it makes 22dB of noise.
Getting at the fan
Opening the case means breaking the "Warranty void if seal is broken" sticker. Your choice!
But, by far, the most difficult part is pulling the case clear of a plastic bezel surrounding the IEC power socket. Even the official Service Guide advises: "Remove the cover at the power socket forcibly" (Page 5-4).
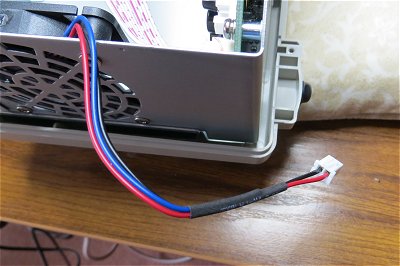
The inner metal back panel is easily unclipped once the two hex pillars attached to the RS232 socket have been removed.
The existing fan is terminated in a standard 2-pin JST-XH plug. As I had a few left over from a project, I was able to solder one to the new fan's red and black wires. The blue speed sensor wire from the new fan isn't used so I slid a length of heat shrink sleeving onto the leads and 'trapped' the blue wire under it.
I tried the 4 x 5mm Torx self-tapping screws that are used to mount the fan before I fitted it in place and, as they seemed really tight, I slightly enlarged the four holes in the fan using a 4.7mm drill.
I decided to leave off the plastic bezel around the IEC socket when I replaced the outer cover. It seems to be more for appearance than anything else but makes it a real pain to get the cover off with it in place and, knowing me, the cover is quite likely to be off a few more times now that the waranty is void anyway.
 As a crude indication once everything was back up and running, I measured the noise level with a simple mobile phone App before and after. With the old fan, the noise (including ambient noise etc) was around 68dB. With the new fan, I measure around 52dB which is a big difference.
Just as important, though, is the perceived (psychological) noise and the new fan seems much better. More a "movement of air" sound rather
than a forced draught hairdrier sound with the old one.
As a crude indication once everything was back up and running, I measured the noise level with a simple mobile phone App before and after. With the old fan, the noise (including ambient noise etc) was around 68dB. With the new fan, I measure around 52dB which is a big difference.
Just as important, though, is the perceived (psychological) noise and the new fan seems much better. More a "movement of air" sound rather
than a forced draught hairdrier sound with the old one.
I don't have any decent temperature-measuring equipment capable of taking measurements with the covers back on so had to rely on both fans' specifications to a large extent.
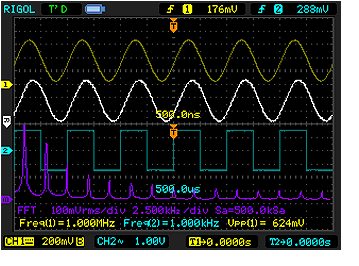
However, I put the DSO's processors through their paces displaying two traces with Alternate timebase settings, displayed a REF trace from Channel 1 while calculating an FFT trace for Channel 2 and left it running for several hours without a hiccup in a room at around 22°C.
Official Rigol Demonstration Video - Part 1
Official Rigol Demonstration Video - Part 2